Dashboards are a great way to show user information like report data and KPIs, but they can also be a great opportunity to give users a richer experience by including messages, shortcuts, video, images and more. This can be done by using Integrify's HTML panel widget, which gives you a tool for displaying a variety of rich content.
In this article, we're going to look specifically at how to create interactive buttons that link directly to launch a process. You can also use a standard hyperlink, but buttons provide a more engaging user experience.
Here's an example of how buttons could look on the Integrify dashboard:
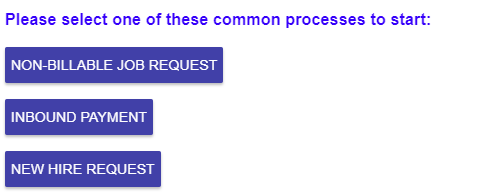
Here's how to create a process launch button.
Edit or Create a Dashboard
Create a new dashboard or open an existing dashboard.

Add an HTML Widget
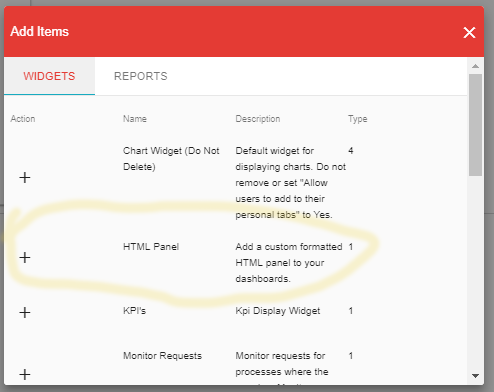
Create an HTML panel on your dashboard by clicking "Add Item" at the top of the Dashboard area and then selecting "HTML Panel" from the list.
You'll get a blank HTML panel:

Click on "Edit Body" in the panel. You may have to stretch the panel out a bit to see all the editing tools initially.
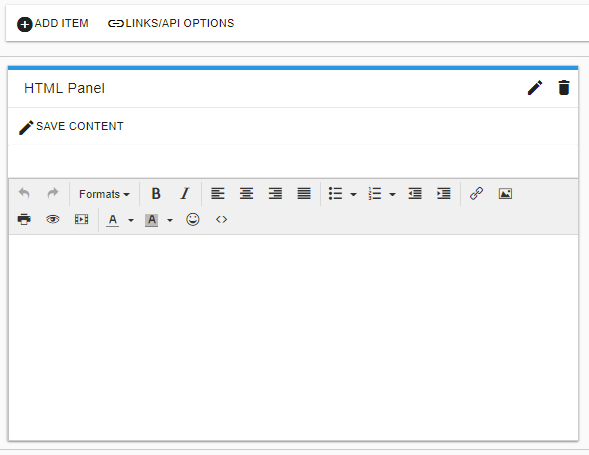
In the HTML editing toolbar, click on the“<>”-icon/button, which will give you access to the HTML source code. A blank "Source code" window will pop up.
Select the Process to Launch, Add the Basic Button
In another browser window or tab, open the process that you're going to want the button to launch. Go to the Process Detail tab of the process and then the "Links/API Options" sub-tab.

You will see several different types of links to launch your process. If you scroll down, you'll see a link option called "HTML Button code for use on an HTML Panel Widget." Copy the code provided. You'll then paste that code into the source code window of your dashboard.
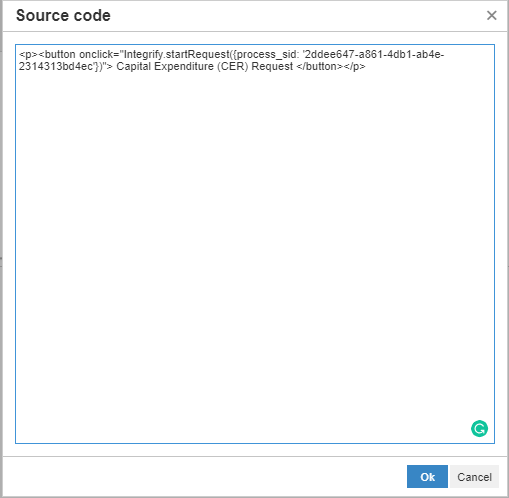
Click "OK" and you'll see a shiny, new button.
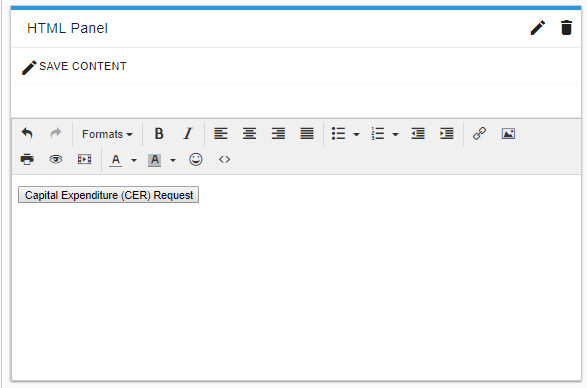
Styling the Button
You can use the button as-is or you can give it the "flat," colored style of our original example. Here's how to do that.
First, go back into the source code of your HTML panel. Copy the code below and paste it below the button code you added earlier.
<button onclick="Integrify.startRequest({process_sid: '2ddee647-a861-4db1-ab4e-2314313bd4ec'})" class="theme-primary md-raised md-button md-ink-ripple">Capital Expenditure Request</button>
Now, find the process_sid from your original button. We've highlighted it here:
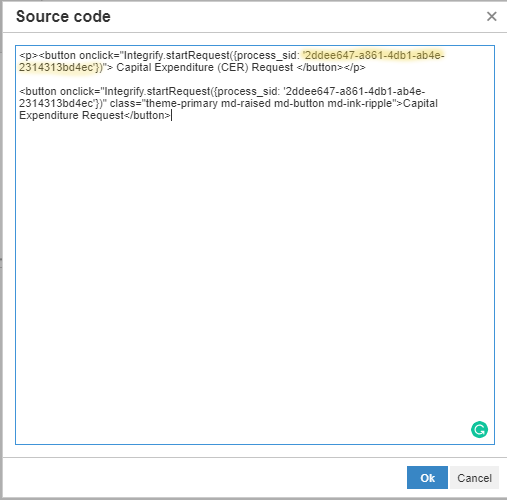
Replace the process_sid in the new, second button with the process_sid from the first button. Hit "OK."
When you return to the HTML panel window, the two buttons will look the same. However when you click "Save Content" your second button will have miraculously transformed.
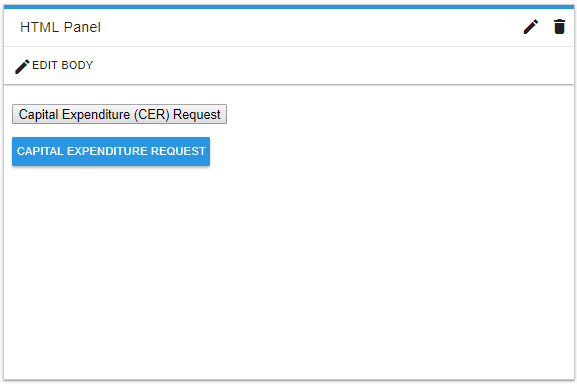
NOTE: The color of the button will be determined by the color theme you've selected for your instance.
You can change the theme in the left navigation to see the impact.

More Styles?
For more button style options you'll need to dig into Angular JS Material a bit. You can find out more here: https://material.angularjs.org/latest/CSS/button.
Adding a Pop-Up Button Warning
Adding an 'Are you sure...?' prompt to process launch buttons requires some simple javascript to be added. Example:
<button onclick=" if ( confirm ( 'Are you SURE want to start the self-destruct sequence?' ) ) Integrify.startRequest({process_sid: '877f7522-36fb-4f1b-8a71-5cbe0c978faa'})">
 Start the Self-Destruct Sequence
</button>
Comments
0 comments
Please sign in to leave a comment.