The Process Detail tab of any process defined within Integrify lets you edit basic process settings, copy a process, make a version of an existing process, export a process or delete a process entirely.
In this section we will discuss:
- Process Detail Settings
- Set Roles & Permissions
- Deleting a Process
- Links/API Options
- Copy/Export/Version a Process
- Publish Status
- Allowing Ad-hoc Related Requests
Process Detail Settings
The Process Detail Settings area contains process-level settings that may be edited and updated at any time. Most of the information is informational, however, a few settings will impact the location of the process or the visibility of the process to the end user.
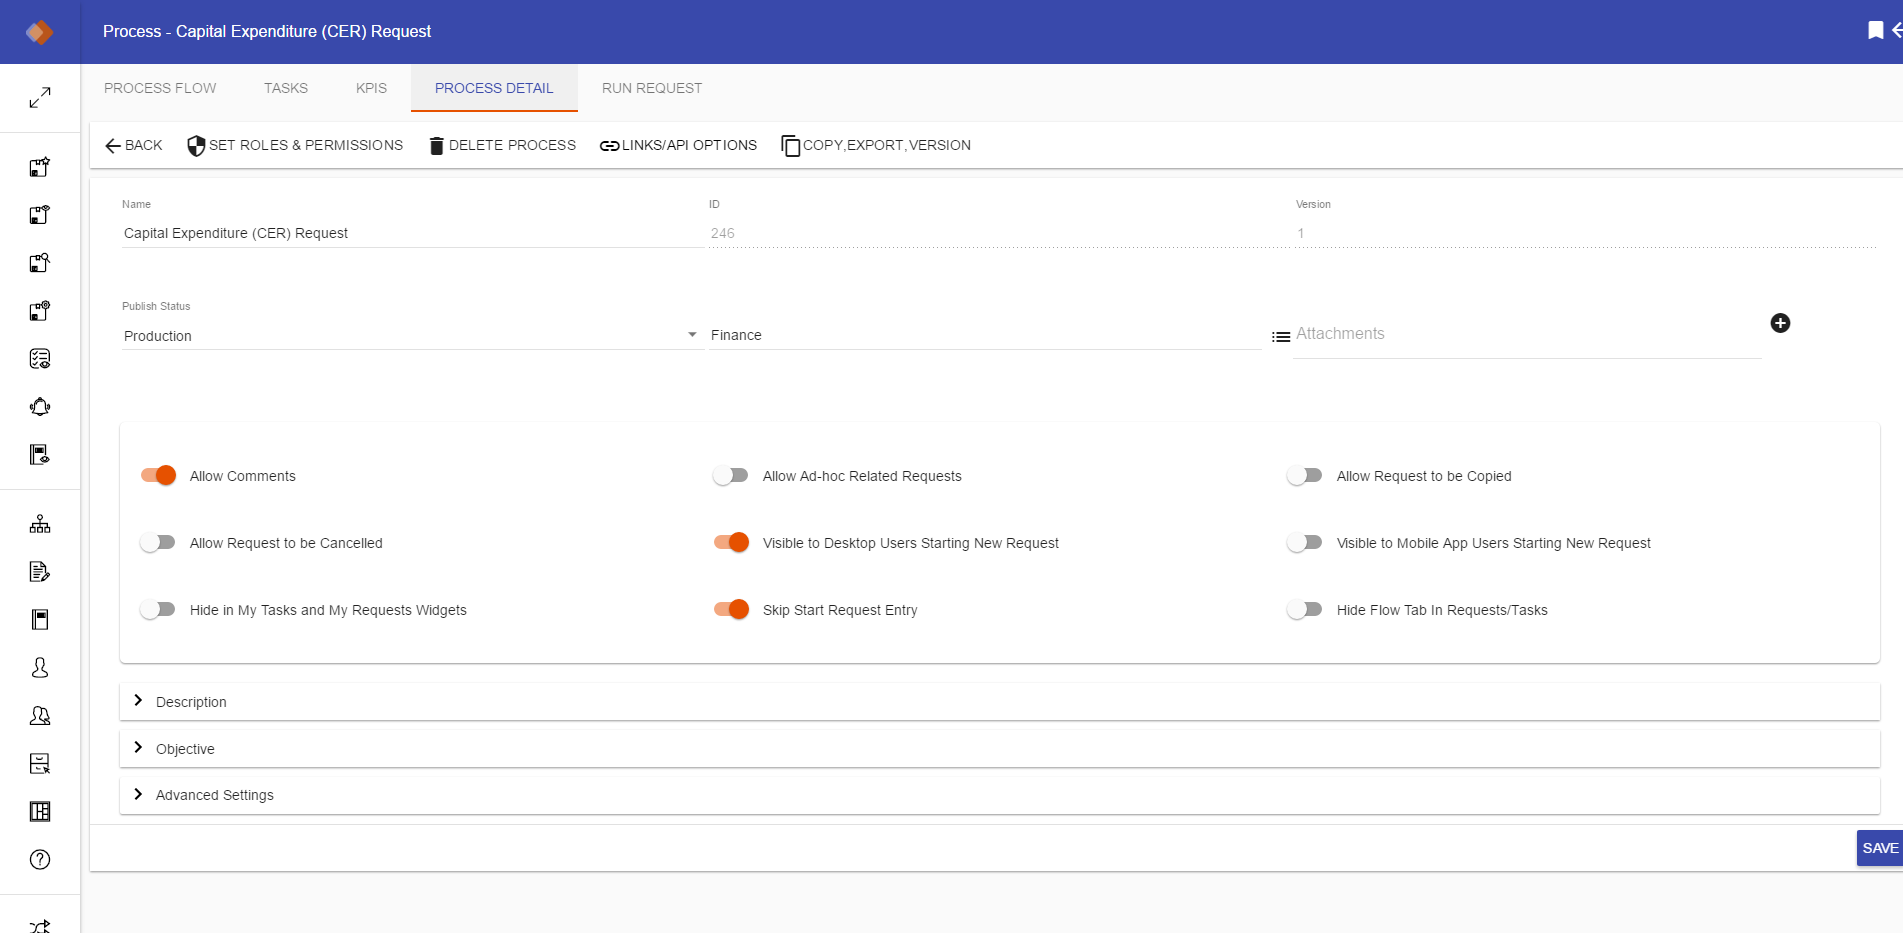
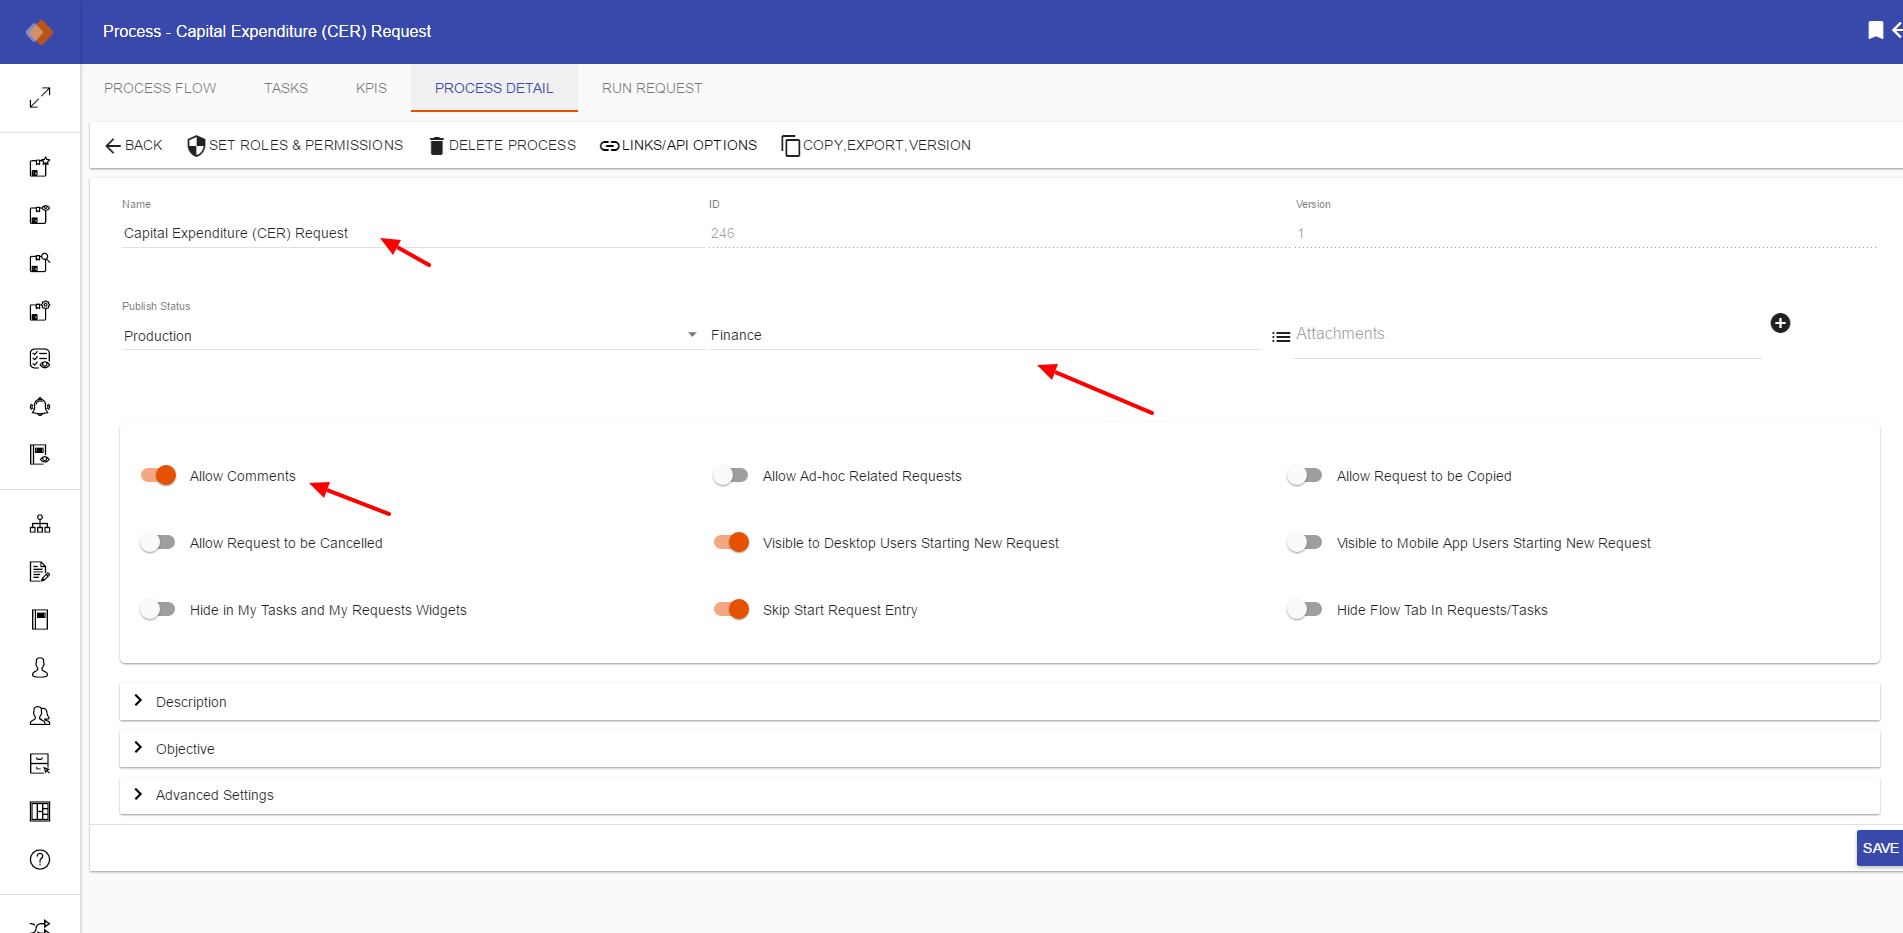
To edit any options with the Process, simply click on the particular setting field that you wish to edit (short text, drop-down selection or slide):
The following table is a list and description of all available settings:
| Setting | Editable | Description |
| Name | Yes | This is the process name as displayed to your end user. Names are not unique and may be duplicated in the system if necessary. |
| ID | No | Unique ID of the process. |
| Version | No | Current version of your process. This value increments for each version you create of the same process. |
| Publish Status | Yes | Integrify contains 4 distinct publish status: Development, Testing, Production and Inactive. |
| Category | Yes | The category where the process is stored and where an end user will initiate the process under the Start Request menu. |
| Attachments | Yes | A Process Administrator may attachment additional documentation about the process such as a Visio diagram, Word Document, PDF, etc. This is accessible to the end user. |
| Allow Comments | Yes | Allows you to toggle whether end users are allowed to enter comments for requests submitted against this process. |
| Allow Ad-hoc Related Requests | Yes | Allows end users to launch ad-hoc related requests. This will display a Related Requests section within the Request Detail section of the process for any ad-hoc related requests that are launched by a user. (See screenshot examples below) |
| Allow Request to be Copied | Yes | Allows end users to copy their requests. This will display a Copy Request button above the Summary information on the Request Detail tab of a request. Note: The process must have the first task be a form task. The copy a request feature will present the user with the first form task prefilled with data from the previously submitted form task. |
| Allow Request to be Cancelled | Yes | Allows end users to cancel their requests. This will display a Cancel Request button above the Summary information on the Request Detail tab of a request. |
| Visible to users Starting New Request | Yes | This can hide the request from an end user from initiating this process manually. This setting is most typically used when a process always needs to be started programmatically via Integrify’s Services API. This could also be used for a child process that you don't want displayed when users start requests. |
| Visible to Mobile App Users Starting New Request | Yes | This flag will make the process available for users to start a request from the Integrify mobile interface. |
| Hide in 'My Tasks' and 'My Requests' Widgets | Yes | Hides request activity for this process from the 'My Tasks' and 'My Requests' widgets |
| Skip Start Request Entry | Yes | By default, the setting is not selected. This setting presents an option for a user to either rename a request or select another user to submit the request on behalf of. By selecting this, the initial task will be triggered when the user selects the process to start, bypassing this option. |
| Hide Flow Tab in Requests/Tasks | Yes | By default, the setting is not selected. This setting presents the Flow View tab to end users when reviewing a request or task. By selecting this, the Flow View tab is not presented to the end users. |
| Description (Expand/Collapse) | Yes | Basic description of your process. Visible to the end user when starting a request. |
| Objective (Expand/Collapse) | Yes | Basic objective information about the process. |
| Advanced Settings (Expand/Collapse) | Yes/No | The below items are located under Advanced Settings. |
| This process should be completed in... | Yes | Allows you to set the time interval that the process should be completed in by minutes, hours or days. Often used as data for reports that measure service level agreements (if processes are being completed on time). |
| Email URL Override | Yes | Gives you the ability to set a different URL for the task email notifications. Used for situations where you want to direct users to a unique site for task completion (leveraging the Integrify API). |
| Email From Override | Yes | Email address that the task email notifications from this process will be sent from. |
| Created | No | Date process was created. |
| Created By | No | User who created the process. |
| Last Modified | No | Date process was last modified. |
| Last Modified By | No | User who last modified the process. |
| SID | No | Integrify's unique identifier for the process. |
The following descriptions are related to items found in the Process Detail menu bar:

Set Roles & Permissions
By selecting 'Set Roles & Permissions', you can define users or groups that will have permissions to this process by the following roles:

- System Administrators - Not editable. For all publish statuses for this process, all users that are in the System Administrators group found within the Groups section will have the following permissions for this process: ViewConfig, Edit, Create, Delete, Run, Participate, Grant, Manage, Monitor. See Permissions/Roles section for more details.
- Process Administrators - Editable. By selecting the user icon, you can define users or groups with the following permissions for all publish statuses for this process: ViewConfig, Edit, Create, Delete, Run.
- Process Testers - Editable. By selecting the user icon, you can define users or groups with the following permissions for the Testing publish status of this process: Run, Participate.
- Process Users - Editable. By selecting the user icon, you can define users or groups with the following permissions for the Production publish status of this process: Run, Participate. Note: By default, all users in the Users group found within the Groups section will have access.
Deleting a Process
To completely delete a process from Integrify by pressing the Delete Process button in the top menu of the Process Detail tab. By deleting a process, you are effectively removing the entire process definition and any outstanding requests that may be executing against the process definition will be impacted.
Note: Do Not Delete a process unless you are absolutely sure that no outstanding requests are pending against that process. You cannot un-delete a process once it has been removed.
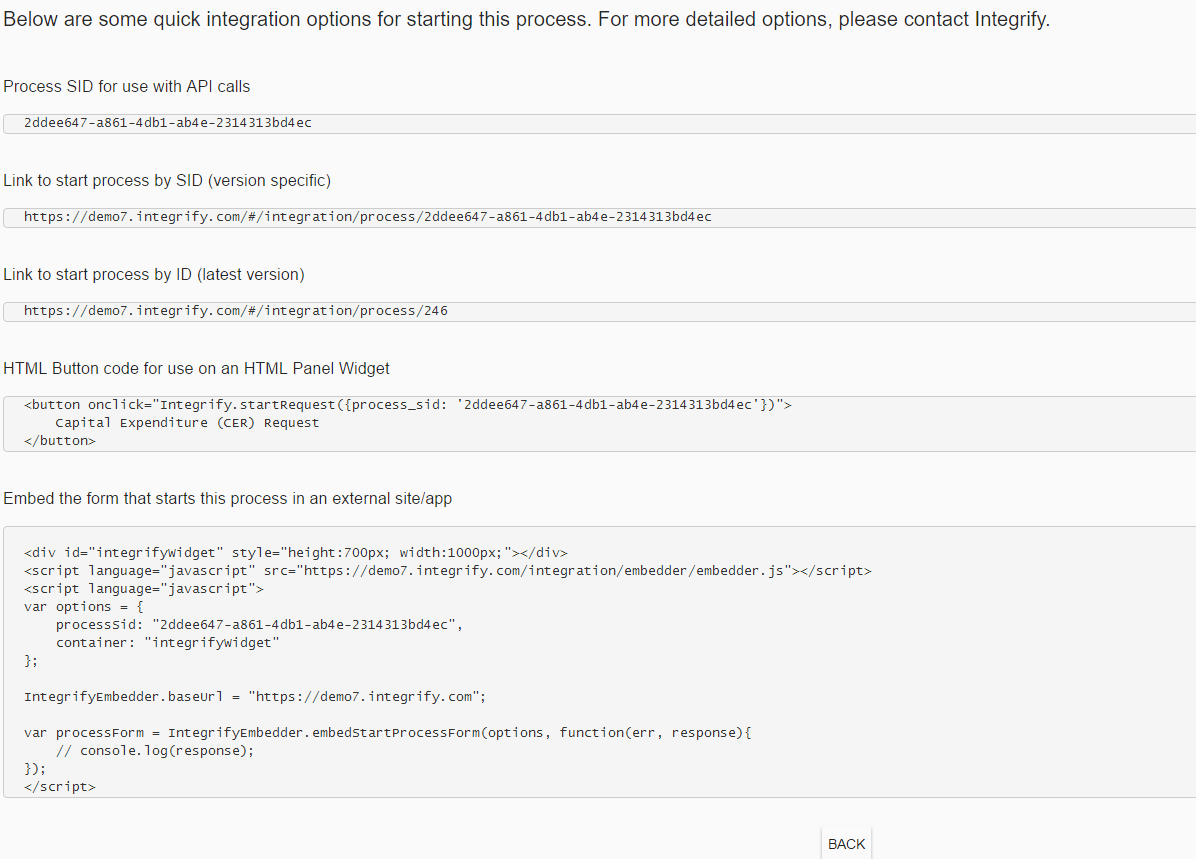
Links/API Options
For customers that have the Integrify API, the Administrators can select the Links/API Options option to see how to link to the process. This allows for the process to be linked to from external webpages and/or within an Integrify HTML Panel widget.
Note: The 'HTML Button code for use on an HTML Panel Widget' option below is very popular and easy to use. If you want to add a button to a Dashboard that displays to users, simply copy the code for the process here into a HTML Panel Widget's source code (See Dashboard section on how to create dashboards and adding widgets to Dashboards).
Simply copy and paste any of the options below:
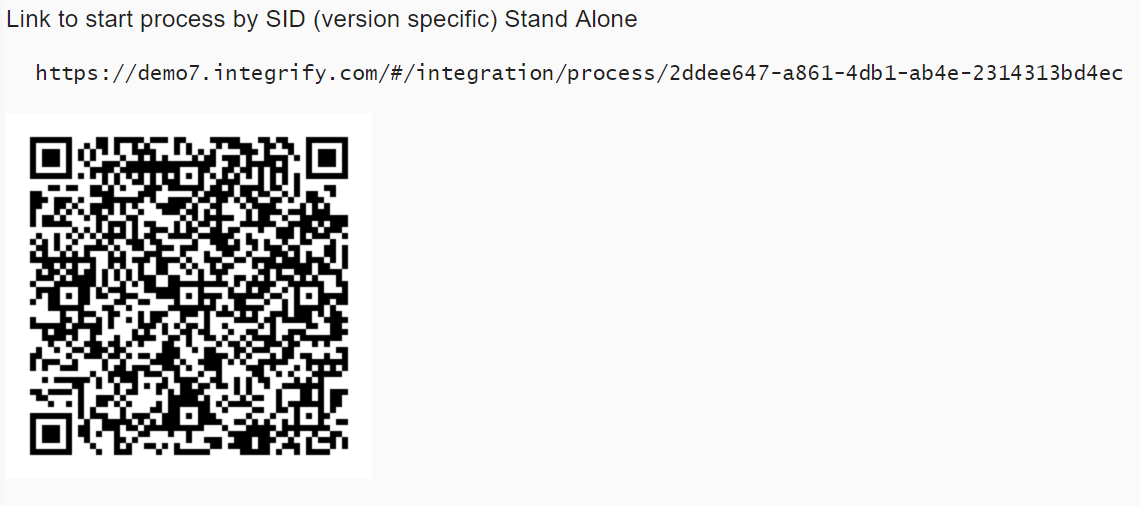
QR Codes/Bar Codes
Each process comes with unique QR Codes. You can scan a QR Code with a mobile device (using a QR Code reader app) to be taken to the first form in a process. As an example, you could print these codes out and tape them to machines and other equipment as part of a maintenance log book process.
Copying/Exporting/Versioning a Process

There is a subtle distinct between the Copy Process and the Version Process options available on the Process Detail tab.
- Copy Process: will copy the entire process definition (tasks, business rules, recipients, etc) and allocate a new unique process ID value. When you select Copy Process, you will notice that the ID value has incremented and the Name of the process will have changed to Copy of {Your Process Name}. The process will remain in the same category but you may change any of the Process Detail options at this time.
- Version Process: will copy the entire process definition (task, business rules, recipients, etc), increment the Version number, and change the Publish Status to Development but leave the unique process ID value the same. When you select Version Process, you will notice that the Version value has incremented and the Name of the process will have changed to Version of {Your Process Name}. The process will remain in the same category but you may change any of the Process Detail options at this time.
Copy/Version a Process
Use the Copy Process option when you would like to create a new process that is similar to another already designed but only need to make small changes.
Use the Version Process option when you need to make changes to an existing process that is currently in production and being used.
Note on forms in a new version: When versioning and then editing forms in a process, be aware that if you don't create copies of existing forms and attach them to the form tasks in the new process, you will be editing forms in both the new and the old versions of the process. You can use the form's References menu to see what other processes the forms are part of.
Export a Process
The Export Process option exports your entire process to a standard process definition file which may be imported into another instance of Integrify.
If you have multiple installations of Integrify installed at your location, it is possible to have a stand-alone development, test, and production environments and move a process seamlessly between those environments. The only exceptions being that any attached files to the process, and any task type that requires templates (PDF and Excel task types) are not included in a process export. Those templates and attachments will need to be added to the imported process, and the task will need to be reconfigured.
When you select Export Process, you will be presented with a dialog to save the exported process definition file to your desktop.
Publish Status
Integrify has been designed so that a single Integrify installation may act as a development, testing, and production environment. This is accomplished through a combination of Publish Statuses and system security.
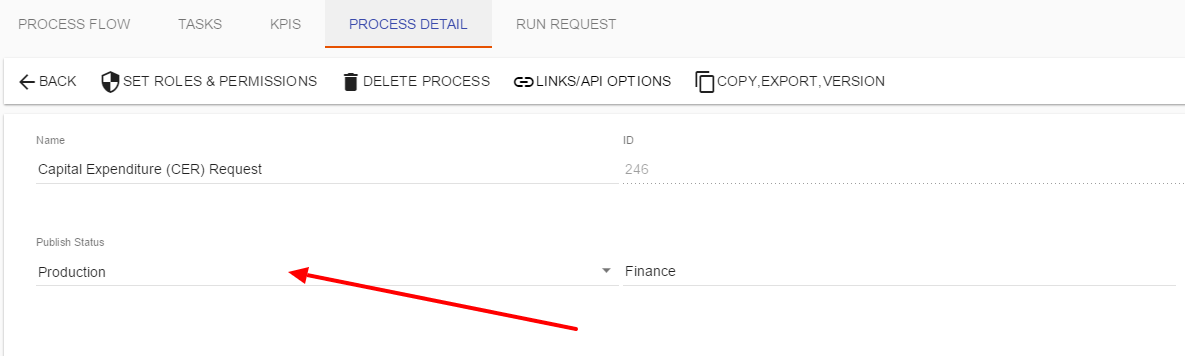
Once you select the Publish Status field, you will have the option to change the process publish status:

There are four distinct Publish Statuses that may be applied to a process which follow the typical life cycle of a process
- Development: used during initial process configuration, development, and unit testing.
- Testing: used after unit testing and for a wider audience other than the process developer.
- Production: used when the process is live and available for your end users.
- Inactive: used when a process is decommissioned and a new version of a process has been published to Production. The Inactive status allows existing requests against that process definition to complete normally but no new requests may be started against it.
In a typically Integrify installation, security is set-up so your end users can start/view processes that have a Publish Status of Production. By integrating the Publish Status of a given process with system security it makes it possible to have that single Integrify installation to act as your development, testing, and production environment.
For example, when a new process is created, the default Publish Status for that new process is set to Development. If your end users were to navigate to the Category that contains the new process they would never see the process. The Integrify system security filters out processes the end user can see by evaluating the Publish Statuses of processes in any given category(s).
Similarly when the development cycle for the new process is complete and you wish to perform QA testing with a larger group of users, you would change the Publish Status to Testing. Again, your average end user would be restricted from starting this process as he/she does not have access to processes with a Publish Status of Testing. But, it is possible to create secondary role(s) in Integrify such that certain users could see this process if the role they are in can see processes with a Publish Status of Testing.
Finally, after testing is complete and you move the Publish Status to Production, then your Process Users group would be able execute the process when they log into Integrify.
Allowing Ad-hoc Related Requests
By selecting the 'Allow Ad-hoc Related Requests' in the Process Details settings, users will have the ability to relate a request for another process to a request for this process.
Users can choose to launch a request as a child to the request that is being viewed or choose an existing request as a parent of the request being viewed.
Screenshots of how a user can launch an ad-hoc related request when the process allows for it:

Comments
0 comments
Please sign in to leave a comment.