The HTML Panel Widget can be added to your dashboard and is used frequently for a variety of purposes. Some include instructional whereby user directions can be added or informational such as a broadcast message of a new acquisition or promotion.
Using the HTML Panel Editor in Dashboards
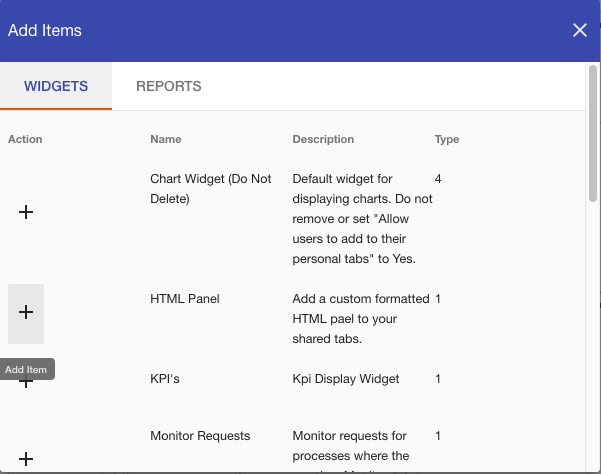
Adding an HTML Panel Widget

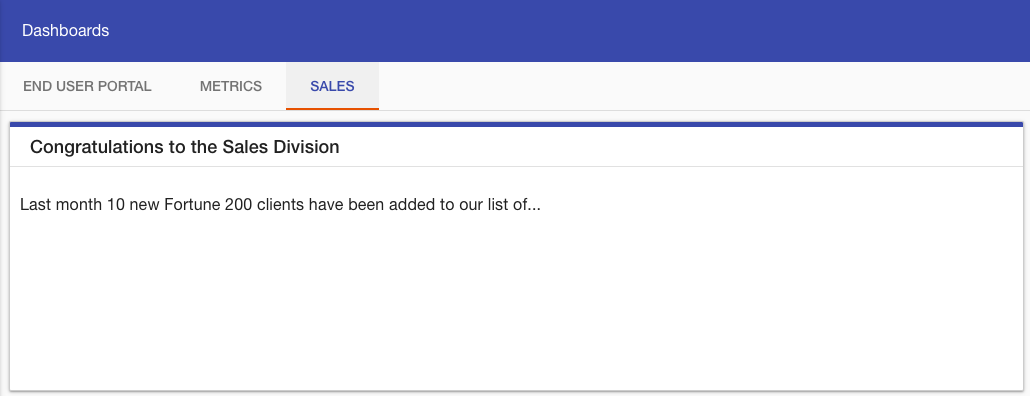
Simple HTML Widget with Text

Extending the HTML Widget with Styling
Adding Process Launch Buttons
Using inline styles, you can do more with our HTML Widgets. For example, if you wanted to add a series of buttons that allow users to launch a process you can do so using this technique.
Styled Layouts
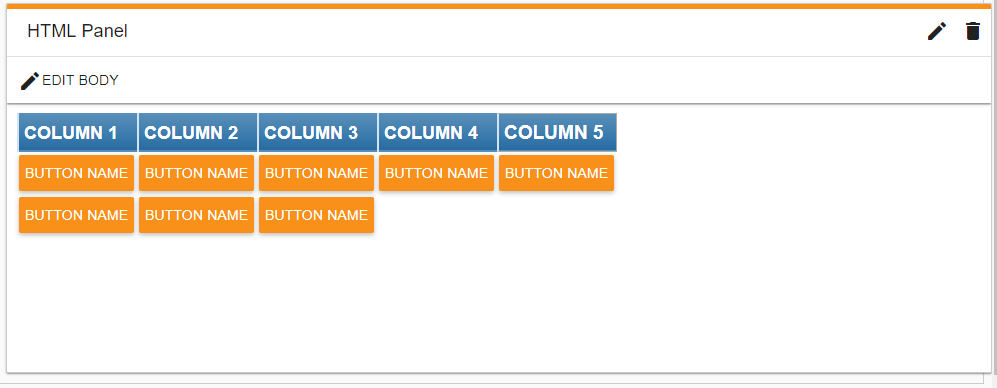
You can use inline styles and DIVs to create layout containers and tables with more flair.
For instance something like this:

We created a table using DIVs and added some class styles to achieve this effect. The code we used is below. To create the buttons, see the previous tip. Of course, feel free to experiment!
<div class="divTableHeading" style="display: table-header-group; background: linear-gradient(to bottom, #5592bb 0%, #327cad 66%, #1C6EA4 100%); border-bottom: 2px solid #444444;">
<div class="divTableRow" style="display: table-row; background: #00000;">
<div class="divTableHead" style="display: table-cell; border: 0px solid #AAAAAA; padding: 5px 5px; font-size: 18px; font-weight: bold; color: #ffffff; border-left: 2px solid #D0E4F5;">COLUMN 1</div>
<div class="divTableHead" style="display: table-cell; border: 0px solid #AAAAAA; padding: 5px 5px; font-size: 18px; font-weight: bold; color: #ffffff; border-left: 2px solid #D0E4F5;">COLUMN 2</div>
<div class="divTableHead" style="display: table-cell; border: 0px solid #AAAAAA; padding: 5px 5px; font-size: 18px; font-weight: bold; color: #ffffff; border-left: 2px solid #D0E4F5;">COLUMN 3</div>
<div class="divTableHead" style="display: table-cell; border: 0px solid #AAAAAA; padding: 5px 5px; font-size: 18px; font-weight: bold; color: #ffffff; border-left: 2px solid #D0E4F5;">COLUMN 4</div>
<div class="divTableHead" style="display: table-cell; border: 1px solid #AAAAAA; padding: 5px 5px; font-size: 19px; font-weight: bold; color: #ffffff; border-left: 2px solid #D0E4F5;">COLUMN 5</div>
</div>
</div>
<div class="divTableBody" style="display: table-row-group;">
<div class="divTableRow" style="display: table-row;">
<div class="divTableCell" style="display: table-cell; border: 0px solid #AAAAAA; padding: 3px 2px; font-size: 13px;"><button onclick="Integrify.startRequest({process_sid: 'ENTER SID'})" class="theme-primary md-raised md-button md-ink-ripple">BUTTON NAME</button></div>
<div class="divTableCell" style="display: table-cell; border: 0px solid #AAAAAA; padding: 3px 2px; font-size: 13px;"><button onclick="Integrify.startRequest({process_sid: 'ENTER SID'})" class="theme-primary md-raised md-button md-ink-ripple">BUTTON NAME</button></div>
<div class="divTableCell" style="display: table-cell; border: 0px solid #AAAAAA; padding: 3px 2px; font-size: 13px;"><button onclick="Integrify.startRequest({process_sid: 'ENTER SID'})" class="theme-primary md-raised md-button md-ink-ripple">BUTTON NAME</button></div>
<div class="divTableCell" style="display: table-cell; border: 0px solid #AAAAAA; padding: 3px 2px; font-size: 13px;"><button onclick="Integrify.startRequest({process_sid: 'ENTER SID'})" class="theme-primary md-raised md-button md-ink-ripple">BUTTON NAME</button></div>
<div class="divTableCell" style="display: table-cell; border: 0px solid #AAAAAA; padding: 3px 2px; font-size: 13px;"><button onclick="Integrify.startRequest({process_sid: 'ENTER SID'})" class="theme-primary md-raised md-button md-ink-ripple">BUTTON NAME</button></div>
</div>
<div class="divTableRow" style="display: table-row;">
<div class="divTableCell" style="display: table-cell; border: 0px solid #AAAAAA; padding: 3px 2px; font-size: 13px;"><button onclick="Integrify.startRequest({process_sid: 'ENTER SID'})" class="theme-primary md-raised md-button md-ink-ripple">BUTTON NAME</button></div>
<div class="divTableCell" style="display: table-cell; border: 0px solid #AAAAAA; padding: 3px 2px; font-size: 13px;"><button onclick="Integrify.startRequest({process_sid: 'ENTER SID'})" class="theme-primary md-raised md-button md-ink-ripple">BUTTON NAME</button></div>
<div class="divTableCell" style="display: table-cell; border: 0px solid #AAAAAA; padding: 3px 2px; font-size: 13px;"><button onclick="Integrify.startRequest({process_sid: 'ENTER SID'})" class="theme-primary md-raised md-button md-ink-ripple">BUTTON NAME</button></div>
<div class="divTableCell" style="display: table-cell; border: 0px solid #AAAAAA; padding: 3px 2px; font-size: 13px;"> </div>
<div class="divTableCell" style="display: table-cell; border: 0px solid #AAAAAA; padding: 3px 2px; font-size: 13px;"> </div>
</div>
</div>
Tables made using <DIVs> are more flexible than using straight HTML tables. However, since you can only use "inline" CSS styles (rather than a linked CSS style sheet) you may want to try some free tools for first creating and styling the DIV table and then turning the output into inline styles:
- DIVTable.com provides an easy tool for creating styled tables.
- Emogrifier provides a way to merge CSS Style Sheets with HTML to create inline styles.
Note: These sites are not affiliated with Integrify and are intended for informational purposes only.
Comments
4 comments
Why don't you allow script tags in the HTML panel? It would be nice to put some custom js on the panel for more versatility.
Spiros,
Apologies for the late reply. Allowing script tags was determined to be a security issue. We are looking into possible solutions to allow them in the future.
Mike
Hi Mike,
Thanks for the reply!
I got around the lack of script tags with the following method. Any notes would be appreciated.
<div id="loadapp"><button onclick=" /* Add js sources here */ let scriptSrcs = ['https://ajax.aspnetcdn.com/ajax/jQuery/jquery-3.6.0.min.js'], script; /* Load all of js sources above to the page */ for(src of scriptSrcs){ script = document.createElement('script'); script.setAttribute('type', 'text/javascript'); script.setAttribute('src', src); document.head.appendChild(script); } document.getElementById('loadapp').style.visibility = 'hidden'; document.getElementById('panelapp').style.visibility = 'visible'; ">Load App</button></div> <div id="panelapp" style="visibility: hidden;"> <!-- Add single page application code here --> </div>Very clever, Spiros! We're going to do some testing on this method and will let you know if there are any potential issues.
Please sign in to leave a comment.