This document will walk you through creating a new Integrify instance on your server using the OnPremise Manager.
- This document assumes that you already have a successfully installed Integrify application on your server. If you have not, please follow these instructions Adding a New Application using the OnPremise Manager document before proceeding with a new instance.
-
First follow the instructions to start the Integrify OnPremise Manager here: Running the Integrify OnPremise Manager
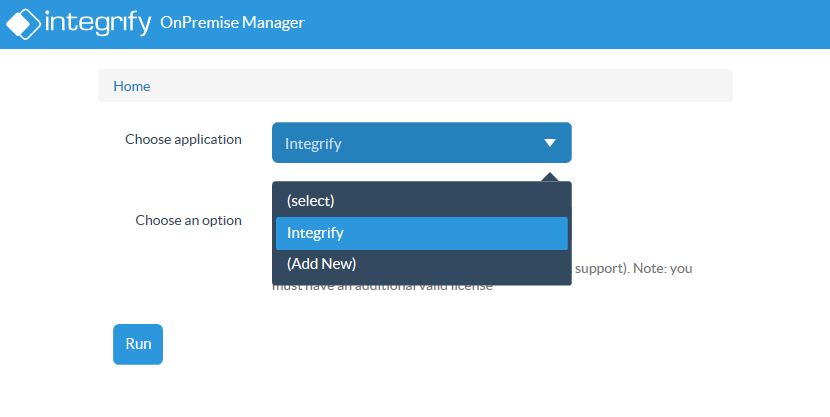
- Once you are logged in, choose the application that you would like to add an instance to from the 'Choose application' drop-down (i.e. Integrify).

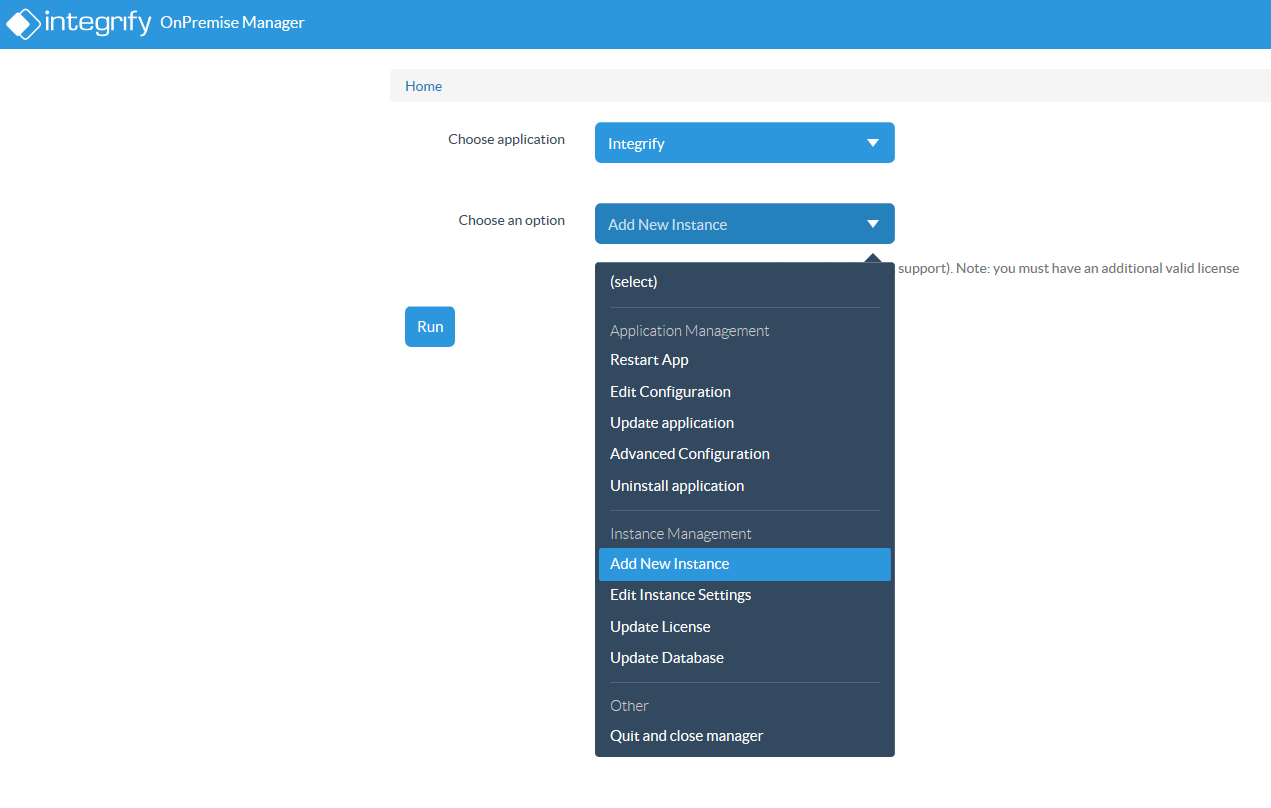
- From the 'Choose an option' drop-down, select 'Add New Instance' and click 'Run'.

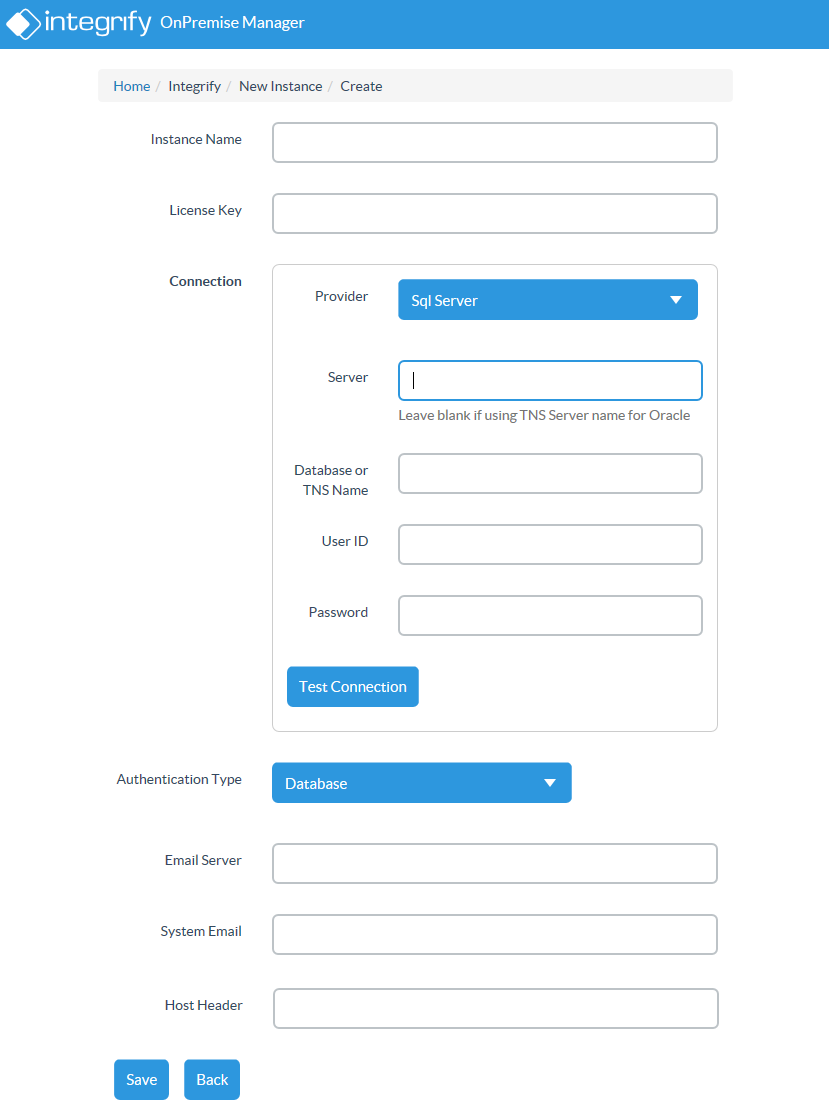
- You will be presented with a new screen to configure the Instance. See below for descriptions of each option and how they are used.

-
Instance Name
- The Instance Name needs to match the license name provided to you in your Integrify welcome email. Capitalization does matter, so use the exact license name sent to you.
- The Instance Name needs to match the license name provided to you in your Integrify welcome email. Capitalization does matter, so use the exact license name sent to you.
-
License Key
- Enter the license key as provided to you in your Integrify welcome email.
- Enter the license key as provided to you in your Integrify welcome email.
-
Connection - NOTE: This is where data where be stored.- Provider - Select the database backend you will be using for the integrify database (Only SQL Server is supported).
- Server and Database or TNS Name
Server - Type the name of your database server that Integrify will connect to. Do not forget to use the proper format if you are running SQL instances (e.g. servername\instancename)
Database or TNS Name - Type the name of the database that you setup for Integrify's use to store data - User ID - .Type the user account you setup earlier that has database owner rights to the database.
- Password - Type the password credentials for the user.
- Provider - Select the database backend you will be using for the integrify database (Only SQL Server is supported).
-
Authentication Type
- Always choose Database for new Instances.
- Always choose Database for new Instances.
-
Email Server
- Type the name or IP address of the SMTP Relay that Integrfiy will use to send out emails.
- Type the name or IP address of the SMTP Relay that Integrfiy will use to send out emails.
-
System Email
- Type email address to be used be the system to send email (i.e. noreply@integrify.com)
- Type email address to be used be the system to send email (i.e. noreply@integrify.com)
-
Host Headers
- Type in the full qualified DNS name you wish to use to access your Integrify installation
- Type in the full qualified DNS name you wish to use to access your Integrify installation
- Once this configuration satisfies your environment, click 'Test Connection' in the Connection DB section. If your configuration is solid, you should see the following popup.

If you receive an error, double check your Connection settings, and try again. If you still receive and error, contact the Integrify Support Team by submitting a help request on the Integrify Support Site. - At This point we should have a fully configured instance and a database schema waiting to be filled with your license and instance information.
- You now have an instance of Integrify that is ready for your license and database to be updated. Click 'Save'. To update your license follow Update your License with the OnPremise Manager. To update your database follow Update your database with the OnPremise Manager.
Comments
0 comments
Please sign in to leave a comment.