This document will help guide you through defining custom path locations for the above referenced items. Note that there will be a very small reset that takes place at the end of this guide (downtime of about 5 seconds max) so plan accordingly. It is recommended that you read this entire guide prior to performing any actions. There are two reasons you may need this guide:
- FORCE DEFAULTS - In some cases the defaults built into the application are not 'taking' and you need to specifically tell the app about the locations using this guide.
- MOVE LOCATION - Whether you are running out of local disk space for attachments, want to speed up Integrify updates by bypassing permission setting on the attachments folder, or need them in a shared location because you are load balancing (or 100 other reasons), you will be performing a move.
If all defaults are used during the Integrify installation, then the default locations for files are as follows:
- attachments - c:\integrify\app\service\attachments\
- licenses - c:\integrify\licenses\
- reports - c:\integrify\app\service\reports\
- temp - c:\integrify\app\service\temp\
Integrify is capable of using either Local or UNC pathing to hit the locations referenced above. This means that these areas can be located anywhere on your network or application server provided they are fully accessible (full rights) by the account configured as both the IIS Integrify application pools account and the Integrify windows services account.
Here are the steps involved:
- If you are just forcing the defaults GOTO STEP 4, otherwise goto the next step.
- Validate/change your service and application pool account: By default, Integrify uses the 'Network Service' account as it's service account. If you are moving to another local location (a d: drive or similar), you will likely need to just create the new location and assign full permissions to that account. If you are moving it off-server, then you may need to use a valid domain account. We will assume that you know how to change these to a matching account in the advanced settings of each 'Integrify' application pool and the properties of each 'Integrify' service. Again, make sure the account used has full rights (both at the file system level and share level) to the location we are moving things to prior to changing the account.
- Initial move of files: If you are moving a large attachments folder you are going to want to run some sort of initial copy of the folder to it' new destination. This will minimize downtime for the final move and prevent missing attachments. We recommend robocopy in a script, but you can use the simple copy/paste as well. This ONLY applies to the attachments as the others are very small.
- Run the Integrify OnPremise Manager. Reference Running the Integrify OnPremise Manager for instructions
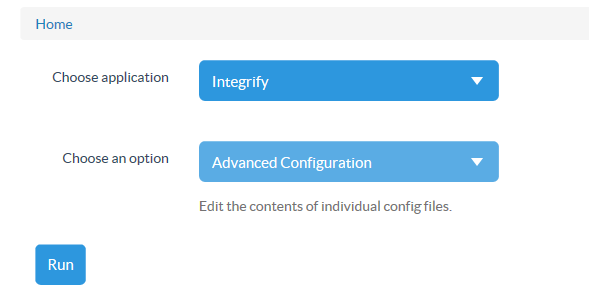
- In the "Choose application" drop-down, select the Integrify application installation that you wish to change. From the "Choose an option" drop-down, select "Advanced configuration". click "Run".

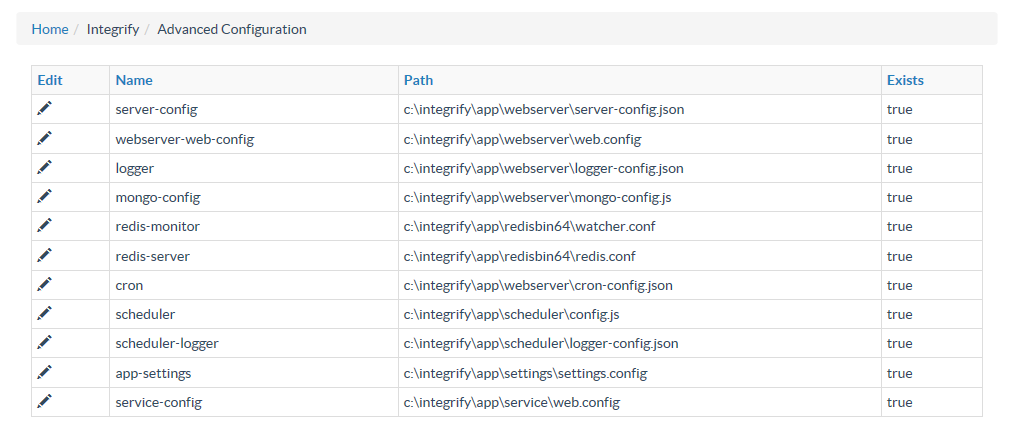
- You will be presented with the following screen. Click the edit icon next to "server-config"

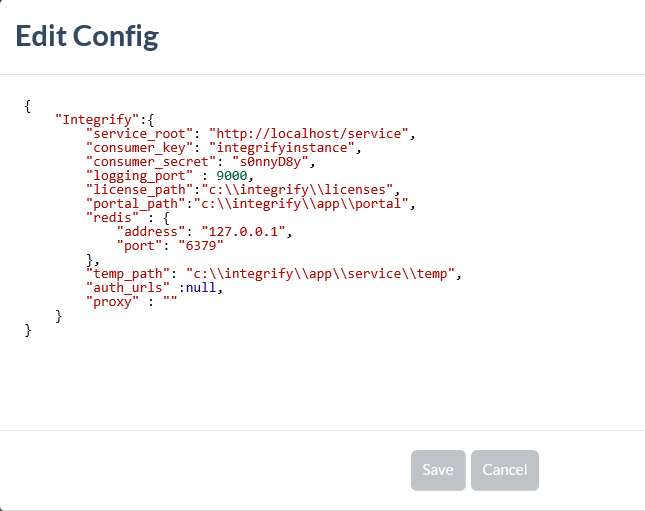
- A popup window will display the current server-config similar to below. Two parameters need to be present: temp_path and attachments_path. if the attachments_path parameter is missing, you can add it by copying the temp_path parameter and pasting it on the line directly below it. Make sure you properly escape the "\" with a "\" (as seen below) and that the line ends with a "," character if syntactically needed. After the desired changes are made click "Save".

- Next click the edit icon next to app-setting. Locate the "file-based asset settings" section of the file and uncomment the entire section so that it looks something like below:
<!-- file-based asset settings -->
 <add key="temp_path" value="c:\integrify\temp"/>
 <add key="attachments_path" value="c:\integrify\attachments"/>
 <!-- <add key="legacy_attachments_path" value="" /> -->
<add key="reports_path" value="c:\integrify\reports" /> - Towards the top of the file, you will find the follwing defining the license location:
<add key="license_file_path" value="\\sevenfiles\licenses"/> - Make the temp, license and attachments settings match the 'server-config' file you edited earlier in this document. You do NOT need to escape the "\' character in this file. Additionally, there is a reports path that may need configuration if you are performing a move. The legacy_attachments_path setting can stay commented out as in the example.
- After the desired changes have been made click "Save". and return to the the OPM home page.
- If you are just forcing the defaults then goto step 14, otherwise carry on.
- Here you will perform a final sync to the new locations you are moving to. If just using a copy/paste technique for the attachments, you can skip existing files in the attachments folder and merge. Please note that you can delete anything in the temp folder older than a few days to save copy time. Do not move on until this sync/copy is complete.
- Restart the Integrify Application using the OPM for all the location changes to take effect
Comments
0 comments
Please sign in to leave a comment.